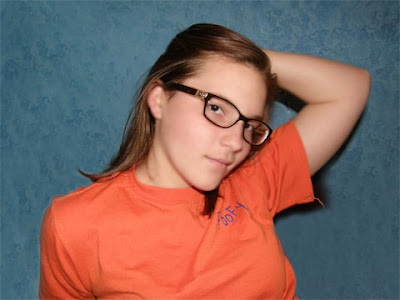
 The first image, "Emily-posing" was used to show the softening technique and to how to hide blemishes. First, I made a duplicate layer. Using the original layer, I gaussian blurred it to 10 pixels. Then, using the duplicate layer I changed the opacity to 94% so that I could soften the image. To get the softening look, I used the eraser tool to erase all the skin; this made the skin look blurry. Next, I flattened the image so that all of the layers were combined into one. Then, I used the healing tool to get rid of any blemishes on the skin. Finally, I cloned the blue print of the background to make the image look more simple.
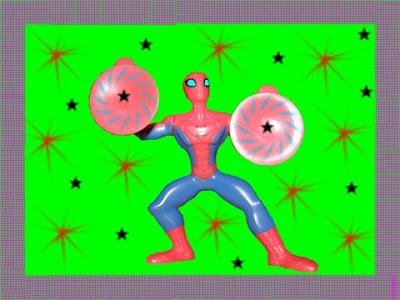 The second image, "Spider man," was used to show how to paint on an image. First, I made a new layer. Using the new layer only, I painted different things on the image. I used a basic brush tool and painted the background in a lime green color. Next, I used an assorted brush tool to make the design on the two circle parts of "Spider man." Then, I used a faux finish brush tool to make the border on the image. I then used two of the assorted brush tools to make the random prints of stars on the image. Finally, I colored in the eyes of the "Spider man" with an ice blue.
 I have used photoshop before, when I was in high school, but I felt like I learned a whole lot on how to do the techniques I mentioned above. In high school we used these techniques, plus more, but I had forgotten how to do certain things. This really helped me recap on what I already learned. I did learn something new though, and that was how to make the skin look soft and smooth. I look forward to learning more techniques.
No comments:
Post a Comment